Choosing the right network cable is crucial for home internet access, business success, and stable data transmission in data centers. Cat6 installation is an important component of a robust network. You might be setting up a domestic network, improving the connectivity of an office, or managing a high-performance data center. In all cases, you need to do a correct Cat6 cable installation to enjoy its benefits.
What are Cat6 Cables?
Cat6 cables are high-performance Ethernet cables used to connect computers, routers, switches, and other network devices to achieve high-speed data transfers.
Cat6 cables are Ethernet cables that stand out from older versions like Cat5 or Cat5e due to their higher bandwidth, stricter specs, and optional upgraded shielding. A typical Cat6 cable installation features four pairs of tightly twisted copper wires, and some are equipped with robust shielding for added interference resistance.
Cat6 cables are ideal for home and office networks. They can handle speeds up to 10 Gbps (Gigabits per second) at shorter distances (up to 55 meters). This makes them an excellent choice for streaming, online gaming, and transferring big files without interruptions.

Why Choose Cat6 Cable Installation?
Cat6 cables are the backbone of modern network cabling, and they come with noteworthy improvements over previous standards like Cat5 or Cat5e:
- High Speeds: Cat6 cables support up to 10 Gbps for distances no longer than 55 meters and 1 Gbps for distances no longer than 100 meters.
- Reduced Crosstalk: Thanks to its improved insulation and tighter wire twists, Cat 6 cables decrease crosstalk. As a result, you’ll enjoy a clearer and more reliable data transmission.
- Better Bandwidth: Cat6 supports a bandwidth of 250 MHz, more than twice that of Cat5e, which supports 100 MHz. This allows seamless adoption of upcoming technologies in the future.
- Future-Proofing Your Network: With a Cat6 cable installation, you are ready to face future advancements both in equipment (hardware) and internet speeds. Smart devices and heavy apps are growing at a fast pace, and with Cat6, your infrastructure will be prepared to adapt without needing an overhaul.
Expert Tip: For any Cat6 cable installation, prefer solid copper cables over Copper-Clad Aluminum (CCA) to ensure reliability and full performance, particularly for business or professional environments. Solid copper delivers superior conductivity, durability, and long-term reliability.
Step-by-Step Cat6 Installation Guide
Your first thought when planning a Cat6 installation might be that you are embarking on an intricate project. Yet, if you have good guidance, you’ll be able to complete it without stressing yourself.
Are you ready to get started? Installing Cat6 cables isn't that hard; you’ll just need to pay full attention to all details and have some patience. So, go get your toolkit, clear a workspace, and let's “dissect” the Cat6 cable installation process little by little.
Carefully follow the steps for Cat6 installation below, and the result will be superior connectivity and a continuous network connection —and, yes, you can do it yourself, without having to spend money hiring a professional.
Practical Tips for Installation
Although we’ll go through the installation process step-by-step, there are some useful tips and recommendations you should know before starting.
Secure the Environment: If you’re working in a domestic setting, make sure pets or kids won’t be around, messing with your cables or tools. This is a safety measure; a pet could chew on your exposed cables, or a curious kid could like to play and pull your cables.
Mark Drill Points in Advance: Even if you do a perfect sketch or diagram to follow, before grabbing your drill, mark the entry and exit points with accuracy. You can do it with chalk, a pencil, or painter’s tape, for example. You won’t want to drill in the wrong place, such as plumbing or electrical lines.
Consider the Weather: Especially if you are running cables outdoors, avoid rainy, humid, or hot days. Humidity or heat can compromise your cables’ integrity and will make it hard for you to do proper sealing.
Check Local Regulations for Buildings: In multi-unit buildings or offices, it’s not unusual to find regulations on how to run Ethernet cables through ceilings or walls. Not following those regulations can lead to penalties and redoing the entire setup.
Use Portable Lighting: In some instances, you’ll be working in dark and/or small spaces, such as basements, attics, or inside walls. Preferably, choose a headlamp and keep your hands free to work.
Immediate Labeling: Labeling cables is a must-do; instead of labeling them after you install them, do it as you go. Believe it, after a while, all gray cables look the same when you’re working with a handful of them.
Take Snap Photos: Although you’ll have a diagram of your setup, taking snap photos of the paths will make it even easier to identify a cable or point when you or someone else needs to make a repair.
Seal Entry Points: Seal around the entry hole of your cables when they come from outdoors and prevent dust, water, or bugs from sneaking in. Silicone is an easy solution to do so.
Step 1: Plan Your Installation
Don’t hurry. Before you start cutting cables or drilling holes, spend a few minutes organizing yourself. Grab a notepad and draw your intended cable paths, and count how many cables you'll actually need. Don’t neglect to look for any tricky eventual obstacles like thick walls or tight corners that might slow your work down.
The basic assessment you need to do, includes:
- Determine the number of cables and their routes.
- Identify areas that may require drilling or additional access points.
Expert tip: Leave some extra slack or spare cables; you’ll thank yourself in the future.
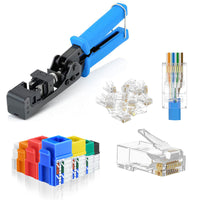
Step 2: Select the Correct Tools and Materials
So now that you have made a detailed plan, the next step is to get all the tools you will need. You won’t want to stop work to run to the closest store to buy some indispensable tools.
This is the list of what you’ll need:
- Cat6 cable
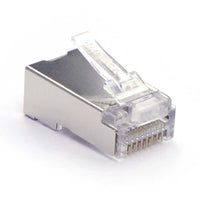
- RJ45 connectors
- Crimping tool
- Cable stripper
- Cable tester
- Cable ties or Velcro straps
Step 3: Prepare Your Cables
At this point, you need to measure your cables. Measure them and recheck the results before cutting. Extend your Cat6 cable and check the exact lengths you'll need before going ahead and trimming your cables. Using your cable stripper, peel approximately an inch of the cable jacket. Do it slowly so as not to nick or damage the wires inside. Make precise, clean cuts.
Summarizing, this is what you’ll need to do:
- Measure and cut the cables to the needed extensions.
- Use a cable stripper to take away approximately one inch of the external jacket. Be careful not to scratch or damage the internal conductors.
Step 4: Wire the Connectors
Here comes what seems to be the most complex part of your Cat6 installation, but don’t worry, we’ll review this in detail. It will actually be easy if you follow the steps listed below:
- Position the wires in the right order depending on their T568A or T568B wiring standards. Be consistent and stick to only one of these standards throughout your whole network.
- Trim the wires cleanly and push them into the RJ45 connectors. Verify they reach the end.
- Crimp the connector rigidly with your crimping tool; this guarantees your cables will deliver the high speeds you’re looking for.
Step 5: Test and Validate
During the testing stage, you confirm that all your work was correctly done and that everything works as it should. Don’t overlook the importance of spending a little time; this can save loads of future frustration. A well-tested cable can be the difference between a stable network and one that arbitrarily fails when you least expect it.
Revising these steps:
- Use the cable tester to corroborate that you terminated the connections properly and that everything is functioning.
- Verify there’s continuity, correct wiring order, and no faults.
Expert Tip: Tag or label each cable at both ends. Proper labeling will be helpful as it will make future upkeeps or troubleshooting simpler and faster.
10 Common Mistakes to Avoid During Cat6 Installation
Even a thoroughly crafted plan can go wrong if you're not careful, particularly when it comes to cable installations. Many network issues arise from almost insignificant, preventable errors made during setup that may, eventually, sabotage the entire network.
We invite you to review the ten most common Cat6 installation mistakes and how to avoid them:
- Not Respecting Length Limits: Cat6 cables should not surpass 100 meters (328 feet). Exceeding this limit can reduce performance noticeably.
- Exaggerated Bending: Avoid sharp bends or kinks. Keep the bending radius to no less than four times the cable diameter; this prevents loss of performance.
- Poor Cable Management: Disorganized and messy cables can result in tangles, interference, and make preservation or repairs difficult. Use cable ties or organizers.
- Mixing Standards (T568A and T568B): Using different wiring standards on opposite ends will disrupt network communication.
- Using Low-Quality Connectors: If possible, always invest in high-quality RJ45 connectors. Low-quality connectors are more prone to faults and failures.
- Running Cables Near Interference Sources: Don’t run your cables alongside power lines or electrical equipment to lessen electromagnetic interference (EMI).
- Improper Pair Untwisting: Do not untwist cable pairs too much; keep untwisting within half an inch to preserve cable performance.
- Skipping Cable Testing: Always, always test your cables after finishing the installation. This simple action ensures all cables are properly wired and functional.
- Improper Crimping Technique: Inadequate crimping results in unreliable connections. Use good tools and crimp firmly.
- Neglecting Future Expansion: Install extra cables or conduits during the initial setup. Anticipation will be a time and money saver.
Expert Tip: Keep the documentation of your installation clear and updated; this will make future upkeep and expansions easier.
Real-World Applications
- Home Networks: It’s a great fit for smart homes, online gaming, having quality video calls, or streaming at high speed and without annoying failures.
- Offices: Supports reliable, high-speed communication for data-intensive tasks such as transmission of large files and video conferencing.
- Data Centers: Cat6 cabling is one of the best decisions you can make if you are in a high-density networking environment that demands stable and effective data transfer rates, like data centers.
Conclusion
Correct Cat6 cable installation is basic to a solid, high-performance network. By knowing the advantages, carefully following all installation steps as described, and staying away from the most repeated errors, you set yourself up for reliable, competent network performance.
Take your time, use quality materials, and habitually maintain your setup for long-lasting, trouble-free connectivity.


Geben Sie als Erster einen Kommentar ab.
Hinterlasse einen Kommentar