If your internet connection often slows down or drops, you might blame your router or internet service provider. But sometimes, the in-wall Ethernet cable is the real cause. These cables can degrade over time, become outdated, or sustain physical damage. For example, you may upgrade your Cat5e cables to Cat6 cables to gain the lowest latency. Learning how to replace Ethernet cables in the wall helps you keep your network stable and future-proof.
How Often Should Ethernet Cables Be Replaced?
One of the most common questions we receive is “When should I replace my Ethernet cables?” While there is no strict timeline for replacement, it’s a good idea to upgrade when your current cables can no longer perform as you required. Over time, various factors can affect cable performance, and some signs can indicate if it’s time to replace your Ethernet cables:
- Visible Wear or Damage: Cracked or frayed cable jackets signal that the internal conductors may be at risk or have failed. This condition often occurs in outdoor installations.
- Network Equipment Upgrade: If you have upgraded your network equipment, the network cables should also be replaced with higher-category cables for higher bandwidth and performance.
- Outdated Cable Category: Are you using Cat5 cables? Upgrading from Cat5 to Cat6 or Cat6a can significantly boost speed and bandwidth for modern applications.
- Physical Damage from Renovations: Home improvement projects sometimes nick or pinch cables, causing partial or full signal loss.
- Reduced Speeds: If the speed of your network doesn’t match the services you hired from your Internet Service Provider (ISP), the underlying reason can be an old cable or poor quality.
How to Replace an Ethernet Cable Through Walls?
Tools You Will Need
Before starting on your project, gather these items:
- The New Ethernet Cable You’ll Use as Replacement (Cat6 or Cat6a): Pick a cable that meets your current and future speed demands.
- Fish Tape or Cable Puller: Guides the cables through wall cavities.
- Cable Stripper: Safely removes the outer jacket without harming the wires.
- RJ45 Connectors and Crimping Tool: You’ll need these if you’re using bulk cable.
- New Keystone Jack and Wall Plate: It must match the category of your cable.
- Stud Finder: This will help you avoid drilling into studs or live wires.
- Labeling Tape: Labeling the cables makes it easier to identify each cable's ends.
Cable Selection Tips: In general, Cat5e, Cat6, and Cat6a cables are the most common options for most houses.
Plan Your Route
Draw a wiring diagram so that you can know where each cable will run. Label the position of your switch and router, and plan how you’ll label your cables and ports.
In addition, you need to calculate the length of cable that you need. Measure the distance between different network devices and add extra distances.
Remove the Old Cable
- Turn Off or Unplug Devices: Power down your router or switch to avoid electrical issues.
- Access the Wall Plate: Unscrew the faceplate and pull it away to expose the cable and jack.
- Disconnect from the Jack: Unclip the cable if it’s RJ45, or use a small screwdriver to release punch-down connections.
- Free the Cable from the Other End: Trace the cable back to your router or patch panel, label it, and disconnect.
- Pull the Old Cable Out: Softly pull the cable from the wall. If it snags, attach a fish tape for a smoother guide.
Install Ethernet Cable in the Wall
- Locate Wall Studs: Use a stud finder to locate wall studs and drill small holes between studs. Be careful not to damage the electrical wires or other pipes.
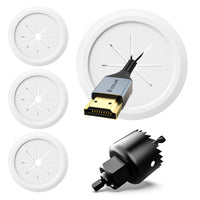
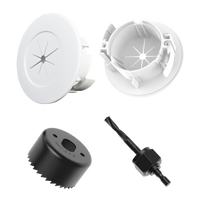
- Open the Wall: Get holes in the drywall and make sure the opening is big enough to accommodate the keystone faceplate.
- Attach the Cable to a Fish Tape: Tape the new cable securely in a streamlined shape to reduce snags.
- Guide the Cable Through: Feed or pull the cable to the destination. A partner can help manage Slack.
- Label Both Ends: Use simple labels like “Office” or “Living Room” to identify each connection. It is beneficial for future troubleshooting.
- Terminate the Cable: Strip about an inch of the jacket, untwist pairs, and follow the T568B color code; Crimp the RJ45 connector or punch down wires onto a keystone jack.
- Mount the Wall Plate.
- Secure it flush to keep dust and moisture out.
- Testing is the final step to check every connection in the cabling. Plug in the cable, power up your devices, and run a speed test to check everything works as it should.
Additional Expert Tips for a Clean, Reliable Installation
1. Use High-Quality Cables
Cat6 cables are typically for up to 1 Gbps over 100 meters. Although some affirm that Cat6 supports 10 Gbps, in reality, this is usually possible only over shorter distances of approximately 55 meters. On the other side, Cat6a unfailingly supports 10 Gbps over 100 meters. That’s why Cat6a is a great choice for future-proofing.
2. Respect the Bend Radius
Avoid sharp bends that can harm internal conductors.
3. Separate from Electrical Lines
Run Ethernet cables a few inches away from power lines to reduce interference.
4. Inspect Jacks and Plates
Loose connections cause signal dropouts. Check for snug connections and inspect if there are any signs of corrosion.
5. Keep a Pull String for the Future
- Add a spare pull string to make later upgrades easier.
- Label Your Cables.
- Label each end of the Ethernet cables during installation so that you can make future maintenance and upgrades easier.
- Use the Right Tools.
- Use the correct tools for installation, such as an electric drill and a drywall saw, to ensure the best results and safety.
- Don’t Forget to Secure and Organize Cables.
- Make sure that excess cables stay in their places neatly. Use cable ties or cable managers to prevent the cable from moving and damage.
Final Thoughts
Knowing how to replace an Ethernet cable in the wall keeps your internet connection strong and consistent. You’ll also know how often should Ethernet cables be replaced and when to do a wall house Ethernet cable outlet replacement. If you follow all these steps—having the right tools, removing old cables, installing new ones, and upgrading outlets—you’ll have a reliable wired network that can withstand high-bandwidth tasks. With the right approach, you’ll avoid slow speeds and frequent dropouts while keeping your home or workspace neat and organized.
For more information on this topic, you can keep up on our blogs. While VCELINK offers general and basic information for our customers and other visitors to the website, it’s not professional advice.


Be the first one to comment.
Leave a comment